Filipino DevOps Engineer – Portfolio Weblog

Embracing continuing self-education and training aligned with helping do DevOps work to serve others

Author: Abe

  • Day 11 of 100 Days of DevOps – with Kode Kloud education – Install and Configure Tomcat server

    Day 11 of 100 Days of DevOps – with Kode Kloud education – Install and Configure Tomcat server

    Hi’ya folks!

    How are you all doing today?

    Good morning!

    My friends, come, it’s almost lunchtime over here. Me needs to cook something for myself soon. But before this, let’s begin our task for Day 11 of 100 Days of DevOps.

    For context necessary, my brothers and sisters, I’m also doing this 100 Days of DevOps from Kode Kloud – so that it becomes part a web portfolio to show potential employers.

    To help me find a job.

    Okay.

    Alright, let’s work together and let’s go.

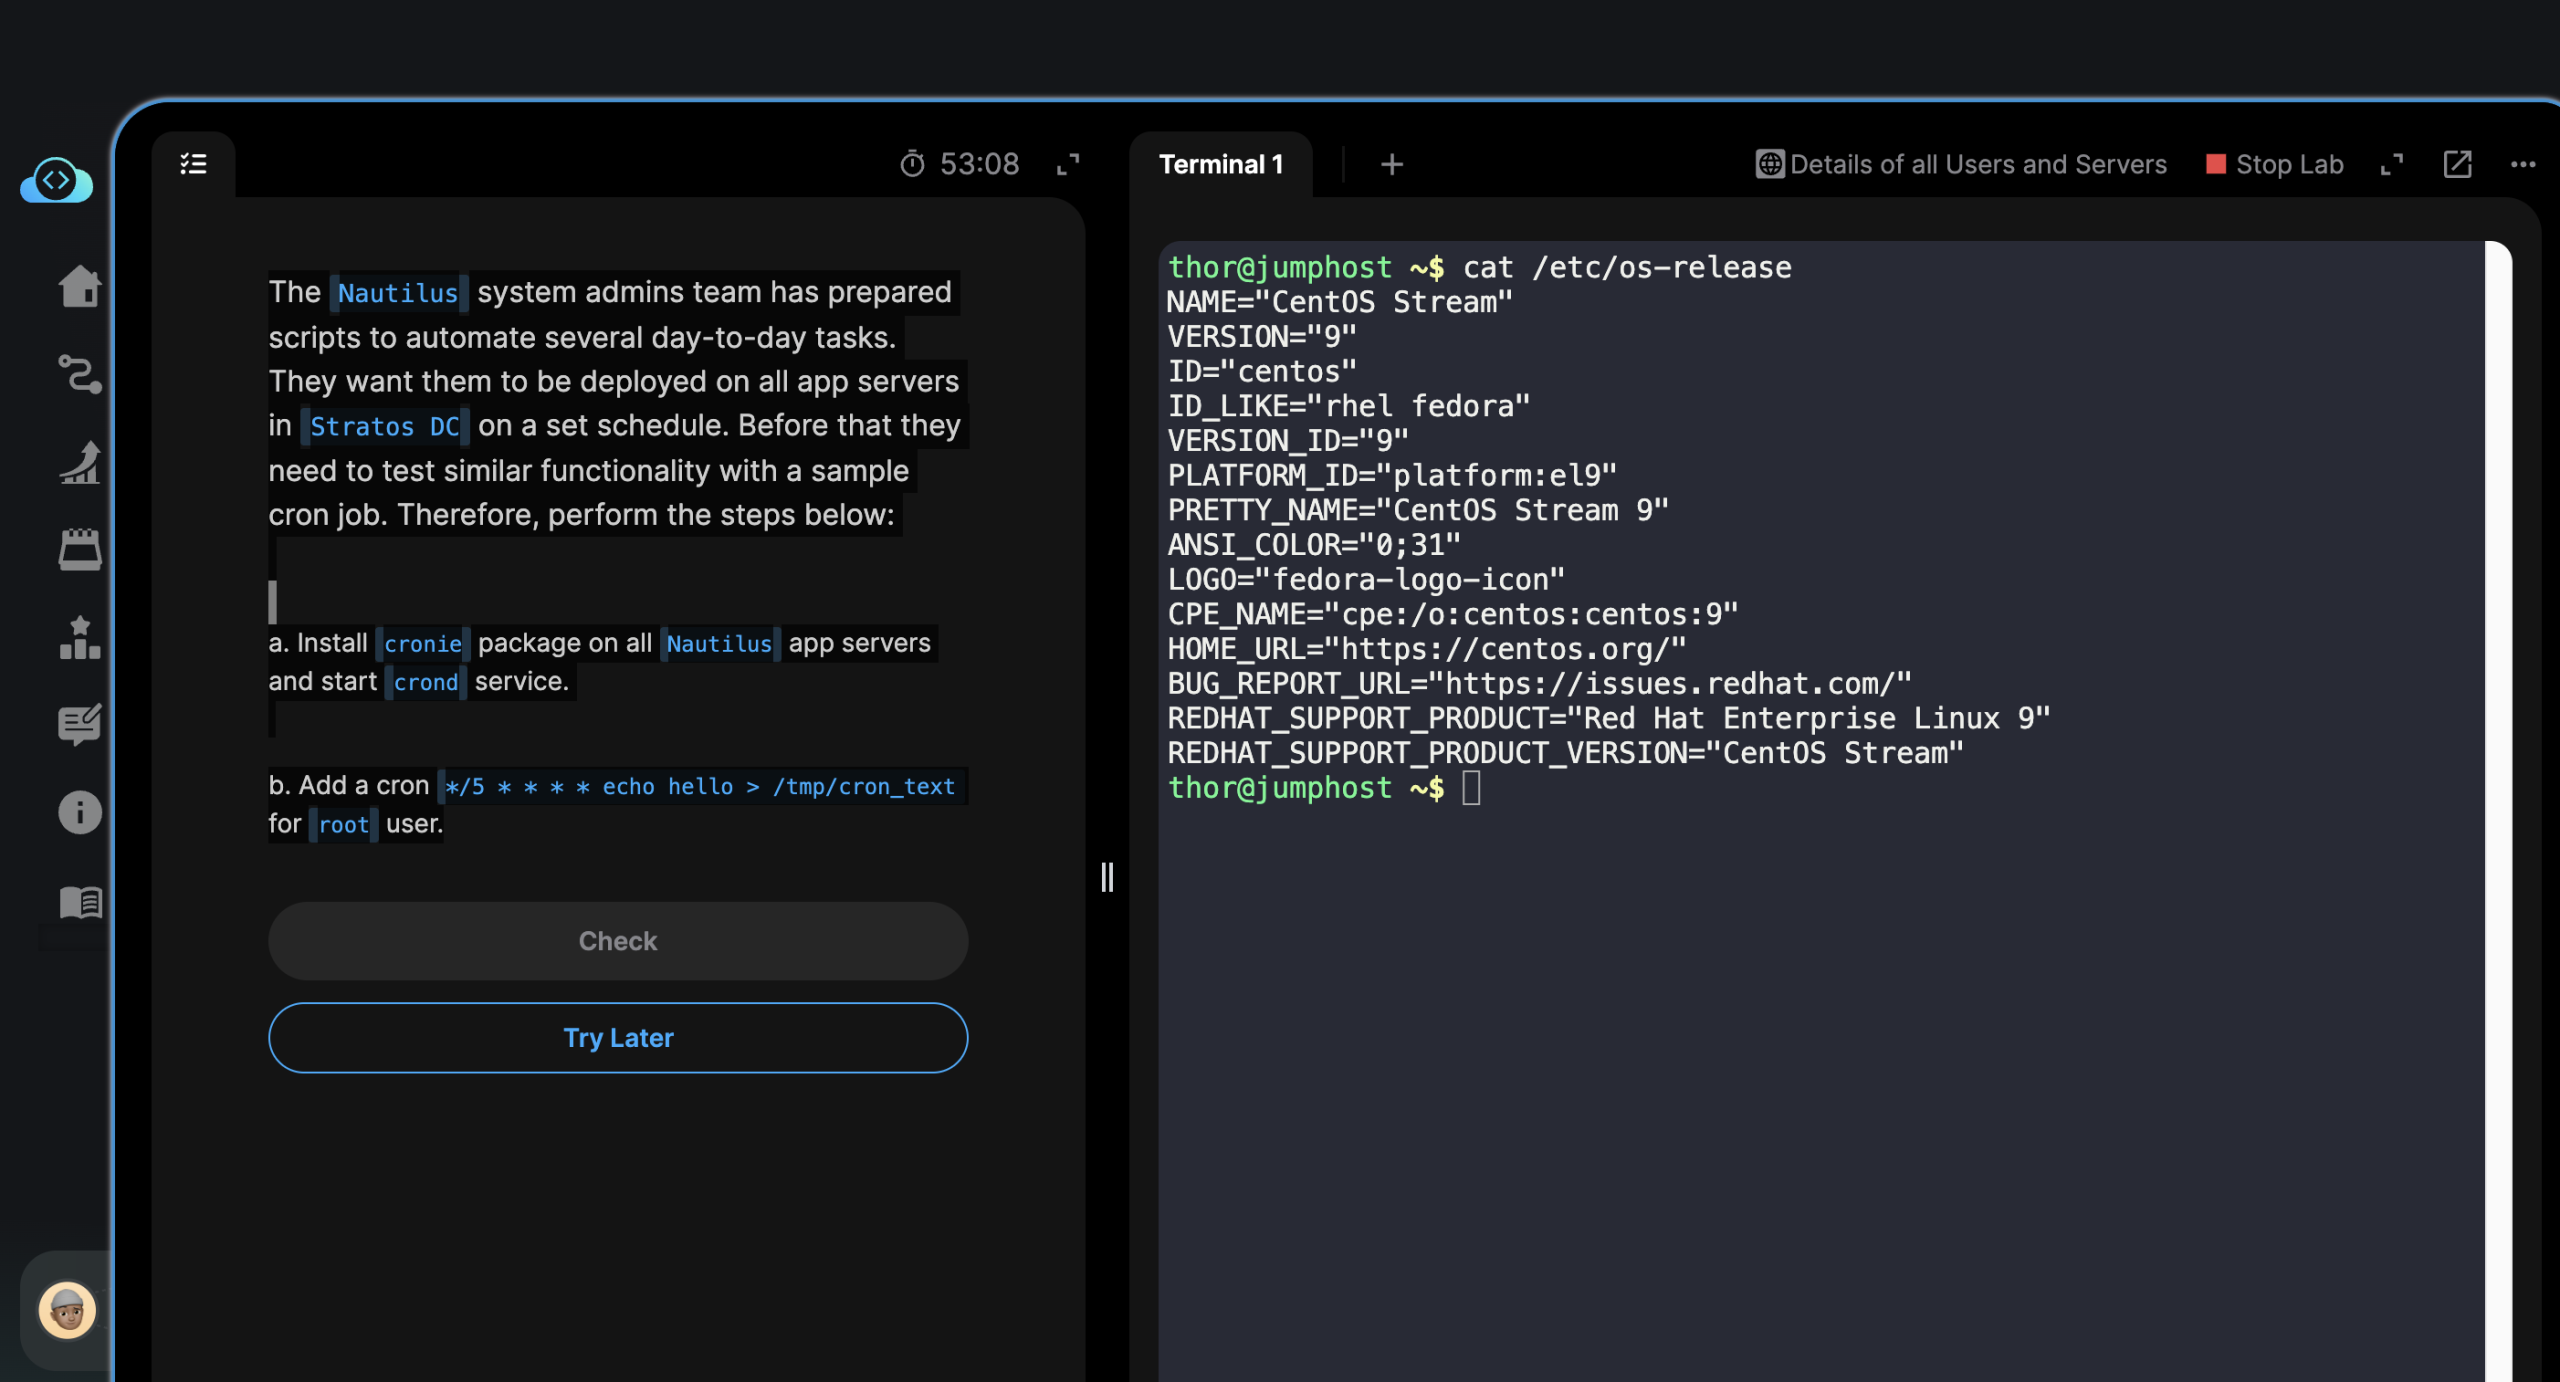
    We have the following task briefing from our smart folks at Kode Kloud.

    The Nautilus application development team recently finished the beta version of one of their Java-based applications, which they are planning to deploy on one of the app servers in Stratos DC. After an internal team meeting, they have decided to use the tomcat application server. Based on the requirements mentioned below complete the task:

    a. Install tomcat server on App Server 1.

    b. Configure it to run on port 8086.

    c. There is a ROOT.war file on Jump host at location /tmp.

    Deploy it on this tomcat server and make sure the webpage works directly on base URL i.e curl http://stapp01:8086

    Okay.

    First off, we must SSH into our web application server 01 (stapp01).

    ssh tony@stapp01

    We enter our server’s password.

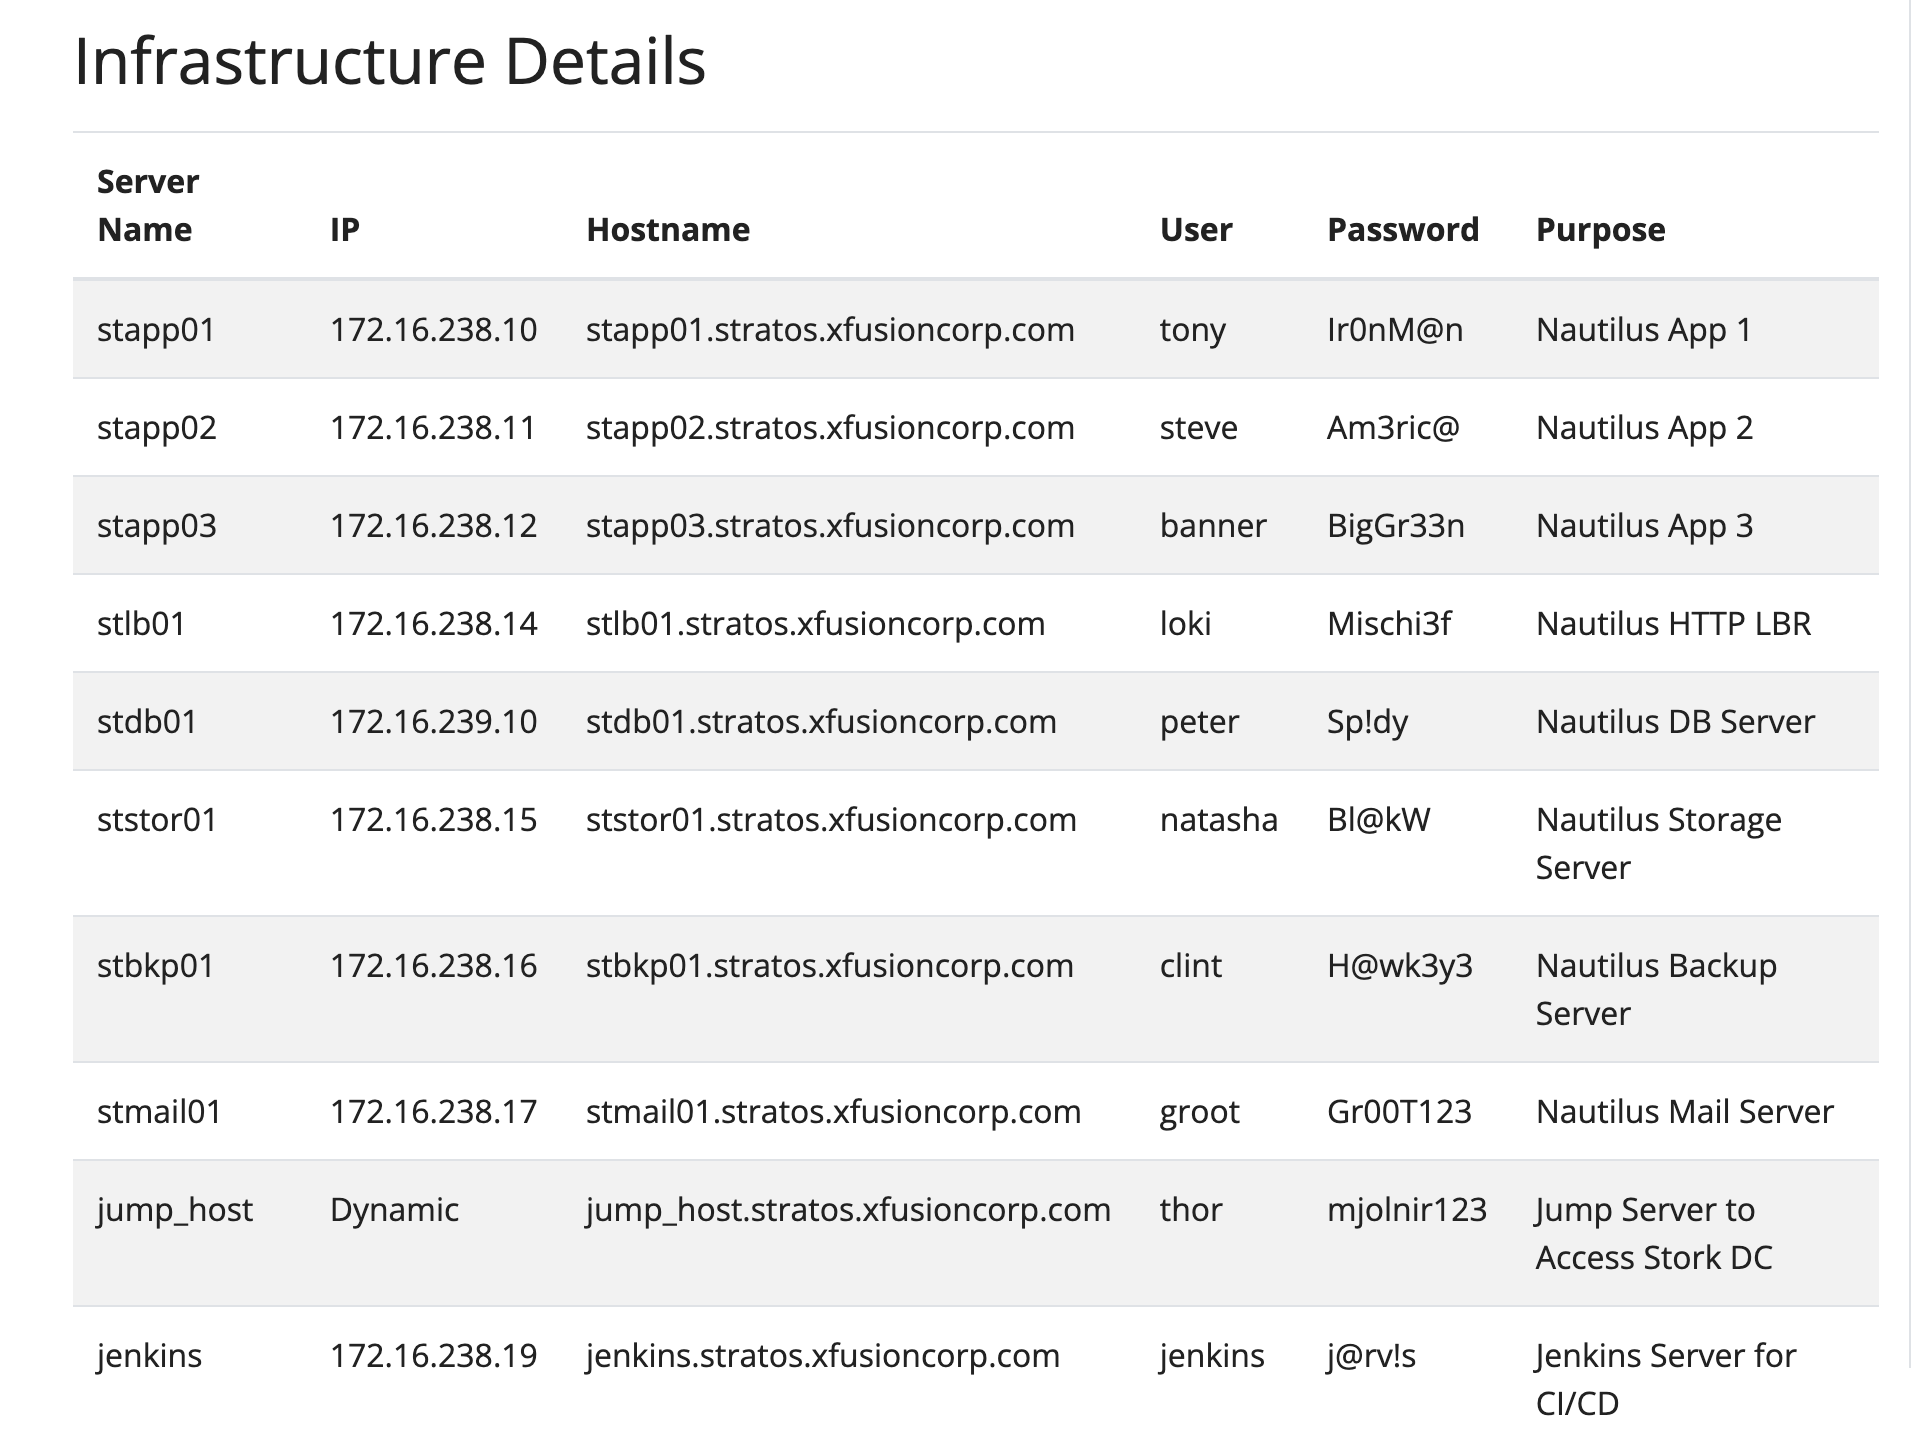
    If you need to refer to details of Kode Kloud infrastructure relevant for this task. Friends, please go over this table:

    Once we’re logged in to our web application server 01. We’ll need to install Tomcat server.

    sudo dnf install sudo dnf install java-1.8.0-openjdk-devel tomcat -y tomcat -y

    Since we’re running on a 9th iteration, or version of CentOS. We’ll need to work with “dnf” for our package manager.

    The Linux command above, invokes and asks “dnf” to find for us, and install two things.

    • java-1.8.0-openjdk-devel
      • Folks, I believe this is a Java SDK, a software dependency of Tomcat.
    • tomcat
      • Tomcat is also installed. As it is our web server for this task.

    After dnf finishes installing. We’ll first need to configure our web server.

    We do so, with editing a configuration file with an application called: “vi”.

    We look for the HTML connector port (that has a default value of “8080”) and replace it with another numerical value “8086”. This changes the port of tomcat from 8080 to 8086.

    Following instructions from our task briefing.

    Press the key “i” to start making modifications. Find the connector port setting and change the port number to “8086”.

    Finally, save changes and then exit the “vi” text-editor application.

    Press “esc” followed with keys “wq!”.


    Next, we’ll need to start the Tomcat web server service, and enable its auto-start process during boot up.

    We do these through entering the following Linux command.

    sudo systemctl start tomcat && sudo systemctl enable tomcat

    Friends, this is a compound Linux command. Meaning we’ve chained two commands going to “systemctl”. To start the Tomcat service. And then, for it to “enable” the Tomcat auto-start during boot process.

    Then, optionally, you can check if Tomcat is already active and running. With this command.

    Note: My friends, please remember that the “sudo” password for our web application server can be found over at our table above. Cheers!! 😀

    sudo systemctl status tomcat

    The print out for this command will tell you the present state, or status of our Tomcat web server service.

    Next up.


    We need to transfer a Java web application from the jump host. And move it to a system directory inside the web application server. Where Tomcat web server can begin serving it up for web access on HTTP port “8086”.

    We call this process, deployment of an app.

    Okay, folks.

    First, we need to go back to jump host (currently, if you’re following along, we’re. logged in as “tony@stapp01”).

    Enter the following Linux command. To move away from current SSH session and fall back to where we were from earlier (jumphost).

    exit

    Alright.

    Now, you should see “thor@jumphost” at the very first portion of your “shell prompt” – sorry, I don’t know what it’s called, really. If you see jumphost there, then we’re good to go.

    We’re told that our Java web app is located inside our /tmp/ folder or directory.

    You can do the following to quick check.

    ls /tmp/

    This will print a list of the contents of the /tmp/ folder or directory.

    Once we have this done. And if we see the web app called “ROOT.war” inside the /tmp/ folder (or directory).

    We do what they call a “secure copy”. With this Linux command.

    scp /tmp/ROOT.war tony@stapp01:/home/tony/

    Doing this will securely copy over the file “ROOT.war” from our jumphost to our web application server (at this directory /home/tony).

    Folks, you’ll need to authenticate with the web application’s server password once more. And if you have proper authorization, the scp program will start copying the ROOT.war file into the web app server.

    Then, we SSH once more into our web app server.

    ssh tony@stapp01

    Enter your server password.

    And once we’re in, you need to do the following.

    sudo cp /home/tony/ROOT.war /var/lib/tomcat/webapps/

    Okay.

    Let’s unpack the command above, and break it down into smaller pieces first.

    • The “sudo cp” is necessary because we will be copying a file from our home directory to a system folder. Without “sudo” access, we can’t.
    • /home/tony/ROOT.war – friends, this is the source directory and file path where the copying takes place.
    • /var/lib/tomcat/webapps – and this is the system path where we need to “deploy” or copy our web app (ROOT.war) to. Folks, this is a folder where Tomcat expects files it needs to serve up (to make it available on a web browser, for example) to go to, and live.

    And then, once this is done.

    We do the following to check if we have the web app available on the web port “8086”.

    curl http://stapp01:8086

    “Curl” is a Linux program that obtains information from things like website pages. That web servers like Tomcat makes available to other things like web browsers.

    Alright, I think we have it up and running.

    Okay, that’s that for now, folks.

    Good job! 😀

    Excellent, so far!

    See you folks in our next lab exercise.

    God bless. 🙌

  • Day 10 of 100 Days of DevOps – with Kode Kloud education – Bash Shell scripts for our Files-backup Automation

    Day 10 of 100 Days of DevOps – with Kode Kloud education – Bash Shell scripts for our Files-backup Automation

    Good morning, my friends.

    How are you feeling at this time?

    Over here, I’m feeling down with the weather (it’s cloudy and gloom is upon us). Well, earlier times before lunchtime – I felt under the weather. Still we must find it inside, to do our next exercise with Kode Kloud engineer program. While we can access learning resources. Let’s keep learning. Okay, folks?

    We rest right after today’s grind, with what God allows us to work with.

    Please don’t feel down. Okay, folks? Instead, let us remind ourselves of things we ought to be grateful to God for.

    Like, we woke up alive this morning. Yes? We have a new chance from God, at every new morning we wake up to.

    And, we have food on our table. Coffee, too. We have clothes behind our backs. A roof on top of our heads.

    Friends, let us remain thankful.

    Okay.

    My dear brothers and sisters, here we are with our task for Day 10.

    We have the following task briefing from good folks at Kode Kloud:

    The production support team of xFusionCorp Industries is working on developing some bash scripts to automate different day to day tasks. One is to create a bash script for taking websites backup. They have a static website running on App Server 1 in Stratos Datacenter, and they need to create a bash script named official_backup.sh which should accomplish the following tasks. (Also remember to place the script under /scripts directory on App Server 1).

    a. Create a zip archive named xfusioncorp_official.zip of /var/www/html/official directory.

    b. Save the archive in /backup/ on App Server 1. This is a temporary storage, as backups from this location will be clean on weekly basis. Therefore, we also need to save this backup archive on Nautilus Backup Server.

    c. Copy the created archive to Nautilus Backup Server server in /backup/ location.

    d. Please make sure script won’t ask for password while copying the archive file. Additionally, the respective server user (for example, tony in case of App Server 1) must be able to run it.

    e. Do not use sudo inside the script.

    Note:
    The zip package must be installed on given App Server before executing the script. This package is essential for creating the zip archive of the website files. Install it manually outside the script.

    Folks, first we SSH into the web app server where we need to do the backups from.

    ssh tony@stapp01

    We enter the server password.

    You’ll find it off of this infrastructure table:

    Recall my friends, that from Kode Kloud’s task briefing. It mentions that the zip (or archiving) utility isn’t initially set-up and installed into our server instance?

    With this, we’ll need to install it. For it’s a dependency that’s required for our backup process to work.

    Since we’re running CentOS Linux on our instance (from previous OS details look-up with cat).

    Remember… “cat” is a Linux program for displaying the text content of a file, or program. To help us remember, think of your house cats. 😀

    Meow-zilla! 😺

    Okay, back to our task.

    Enough about those cute cats (but scratchy and sometimes some cats bite you, or take a quick nibble at you from out of nowhere – or maybe they too want to be playful sometimes, yes? I think and I agree with folks that some cats do this when they like you. only that I hope it doesn’t land me into a clinic for rabies shots.)

    Next, we’ll install “zip” or our archiving utility software with this Linux command.

    sudo dnf install zip -y

    You’ll need to enter your server password once again, for user “tony”. If you haven’t initially elevated your privileges to “root”.

    For a breakdown of what the above Linux command means.

    • sudo – means this Linux command necessitates root-level access. This’ll temporarily grant root user access, if the password we input is correct aligned with a sudoer user. In this case, user “tony” at server instance “stapp01” is a sudoer.
    • dnf – this is a package manager specific for a variant of Linux called CentOS. A package manager helps simplify the process of installing, uninstalling, and updating software in your Linux instance.
    • “install zip -y” – an action, or verb command that tells “dnf” to go find and install the software called “zip”. And that trailing “-y” tells Linux that you agree with pre-installation agreement questions. Like storage requirements, and so on.

    Next we move to the “/scripts” directory or folder with:

    cd /scripts/

    Then we create a bash file for automating our file backup process.

    touch official_backup.sh

    Entering the Linux command above, will create an empty shell file inside the /scripts/ folder or directory.

    After, we invoke our text editor “vi”. To start writing some Bash code into our shell script file.

    vi official_backup.sh

    Press “i” after your text editor “vi” loads.

    And then, start typing the following lines of code, in Bash.

    #!/bin/bash
    
    # Variables
    SRC_DIR="/var/www/html/official"
    BACKUP_NAME="xfusioncorp_official.zip"
    LOCAL_BACKUP_DIR="/backup"
    REMOTE_USER="clint"     # actual backup server username
    REMOTE_HOST="stbkp01"   # backup server hostname
    REMOTE_DIR="/backup"
    
    # Step 0: Create a zip archive of the source directory
    zip -r "${LOCAL_BACKUP_DIR}/${BACKUP_NAME}" "$SRC_DIR"
    
    # Step 1: Copy archive to Nautilus Backup Server
    scp "${LOCAL_BACKUP_DIR}/${BACKUP_NAME}" "${REMOTE_USER}@${REMOTE_HOST}:${REMOTE_DIR}/"
    
    # end of script

    Okay.

    Folks, let us discuss what the Bash shell script above does, and what it is for. Alright?

    Let’s break it down into smaller pieces.

    #!/bin/bash

    Friends, this is what is called a “shebang”. This line of shell code tells the interpreter to use only Bash for parsing (or reading) and doing the instructions found in this shell script.

    # Variables
    SRC_DIR="/var/www/html/official"
    BACKUP_NAME="xfusioncorp_official.zip"
    LOCAL_BACKUP_DIR="/backup"
    REMOTE_USER="clint"     # actual backup server username
    REMOTE_HOST="stbkp01"   # backup server hostname
    REMOTE_DIR="/backup"

    The above are called variable definitions. Folks, please think of it like value storage bins. For example, the variable “SRC_DIR” has a value of “/var/www/html/official”.

    It makes our code reusable, helps so that you don’t repeat yourself all the time, and modular. Which are best practices, from what I know, when it comes to programming.

    Please note, that our backup server details can be found from the above infrastructure table.

    # Step 0: Create a zip archive of the source directory
    zip -r "${LOCAL_BACKUP_DIR}/${BACKUP_NAME}" "$SRC_DIR"

    For the actual backup process. This is our first step, or in programming terms, our step with an index of zero (or step 0).

    What it does is the following:

    • It invokes the software utility “zip” (that we installed first before doing our backup thingamajig.
    • Then it asks the zip utility program to “recursively” archive files and folders found inside this directory or folder:
      • /var/www/html/official
    • And tells zip utility to put the resulting archived zip-file into this directory path “/backup/xfusioncorp_official.zip”
    # Step 1: Copy archive to Nautilus Backup Server
    scp "${LOCAL_BACKUP_DIR}/${BACKUP_NAME}" "${REMOTE_USER}@${REMOTE_HOST}:${REMOTE_DIR}/"

    After we’ve put together our automation (in the form of this Bash shell script). Please make sure to make the shell script executable. This will make it behave more like a program, rather than a text-file.

    You can do that with this Linux command.

    chmod +x /scripts/official_backup.sh

    Next, we securely copy our resultant backed-up zip-file (“xfusioncorp_official.zip”) from our local backup directory (“/backup”) and copy it securely to our Kode Kloud engineer backup server (that you can find at (“stbkp01”)

    Folks, before we can securely copy our backed-up zip file to our backup server.

    First we need to establish an SSH connectivity from our web application server, under the user “tony” to our files backup server with user “clint”.

    One way we can do this, is through the password-less authentication and authorization method we did a few lab exercises ago.

    To do so, we enter the following command, from our web application server (tony@stapp01).

    ssh-keygen -t -rsa

    After you enter this Linux command. It will ask you for the place or directory where you want to save your resulting SSH keys. But prior to this, the program might ask you for a passphrase. This is an extra layer of security where you need to define a password. You can opt not to anymore, and press “enter” when you see the passphrase request.

    However, it will add extra security if you do create a password, or passphrase for your SSH keys.

    ssh-copy-id clint@stbkp01

    This Linux command tells your web application server to securely copy its generated public key to our team’s file-backup server. With the user and hostname “clint@stbkp01”.

    After enter your password, you should be able to transfer a copy of your public key from your web application server (stapp01) to the backup server (stbkp01).

    Finally, once the tasks above are done. Please enter this command from your Linux instance.

    /script/official_backup.sh

    Remember, from the steps above, that we’ve made our “official_backup.sh” shell script into an “executable” file.

    Meaning, if you enter the path on Linux for an executable. It will execute the instructions inside, much like any standalone program.

    My friends, if you don’t see any errors after our backup shell script runs.

    Then that means our task is done.

    Well done! Good job, folks!

    Until next time, my dear brothers and sisters.

    Peace. ☮️

    God bless!

  • Folks, sorry, let’s reflect and pray for a while – We stop & pause.

    Folks, sorry, let’s reflect and pray for a while – We stop & pause.

    What does prayer mean to you, my friends?

    Good afternoon, and greetings to one and all!

    Thanks for being around, my dear brothers and sisters in Christ. How are you folks doing?

    Lately, I had been watching a few more video podcasts, or, I believe you can call those that way.

    From Catholic priests like Bishop Robert Barron, Fr. Fiel Pareja, and Fr. Eva Chibuzo Asadu (and a few others too, whose ministry I get to listen to, online).

    My friends, it is a blessing for me, also.

    A profound way, while still being a practical way, to grow in our Catholic Christian faith.

    Folks, listening to Catholic priests, nuns, brothers and other lay-ministers or persons like us. Has helped lead me to a deeper faith and prayer life.

    Although, I hope it has also led to some behavioral changes. The things I need to change, in order for me to grow as, like you and others, to grow as a disciple of Christ Jesus, our Lord.

    It is possible to grow. Even amidst our modern technology, fast and instant services, and what have you.

    I think, we need faith all the more, nowadays, my friends.

    It is easy for us to get lost, or, to even lose ourselves in the pursuit of so many things. We think are worth the while. Yes, my friends?

    That, for one, we often forget that eternity lasts forever. And that our earthly lives might be, for all that I could imagine, a drop in the vastness of eternity.

    Folks, I’m not saying don’t entertain yourselves with what we have presently. No, sorry.

    In my opinion, I think we should give it some of our serious time. To fervently pray from a quiet block of our time, hopefully daily, if we can, and at times actively listen to our spiritually more mature brothers and sisters in the church.

    With this, I would like to invite you to pray with me. Yes, let’s pray.

    We must get ourselves grounded first.

    We lift up and learn to surrender ourselves to God. And ask God to take care of everything.

    Peace be with you, my friends.

    And thanks for being around here, at this time. God bless.

  • Day 10 of 100 Days of DevOps – Folks our small weekend project 🤖🚘

    Day 10 of 100 Days of DevOps – Folks our small weekend project 🤖🚘

    Hey folks! 👋

    How’s it going over there?

    How are you?

    I just sent off some of my beloved family members off a journey of their own.

    And I just had lunch. Thankful, really.

    Folks, I’m going to rest for the rest of this Friday. I’ll sleep early.

    Then I’ll wake up to do our grind again, with study and some hands-on practice.

    And this reminds me, a small group of well-meaning folks hired me to help them with their website. I need to look into that very soon. God knows I need work and some income.

    Well, who doesn’t have bills and in some cases, debts to repay? Yes, my friends?

    Alright.

    For today, I didn’t look into our Kode Kloud web interface. So I have no idea what’s next in our list of tasks to do.

    Tomorrow, hopefully early in the morning, I’ll get started with Day 10’s laboratory thingamajig.

    For today, I really need to catch up on a book read (or two).

    I’m reading a book about something I want to learn on the side.

    For myself, personally, desiring to geek out and learn, while, also wanting to build something my kids will enjoy getting their hands on. Presently, I have a little nephew, feisty and energetic, and a responsible, diligent daughter.

    God bless them.

    And, folks, here is that something I have been meaning to learn how to put together.

    It’s a small, wheeled robot. That I will call “Wheeler Robotnik”. 😅

    The electronic components, or parts of this, I don’t have yet. At least most of it.

    • Raspberry Pi
    • Breadboard
    • 2x electric dynamo motors with batteries
    • 2x wheels
    • Some connecting wires and a small circuit board that I don’t know yet what it does.
    • In case you’re wondering I think that’s some Lego blocks for its chasis and frame. I think that’ll work fine. Yes.
    • Finally, me thinks I’ll need an SD card too. For storage of a small program that will enable this wheeled robot to move.

    If I’m unable to obtain the necessary pieces and electronics for this one. Perhaps, I’ll try and have a go with something that needs fewer pieces.

    Something simpler, in a way.

    Gradually, we’ll get there, in God’s time, my friends. Okay?

    Okay, that’s it for now.

    I’m going to take it slow for the rest of today, my brothers and sisters.

    Thanks!

    Until next time, folks. Peace be with you all. ☮️

  • Day 09 of 100 Days of DevOps – from & with Kode Kloud education – Troubleshooting MariaDB

    Day 09 of 100 Days of DevOps – from & with Kode Kloud education – Troubleshooting MariaDB

    Peace be with you, in the Holy Name of Christ our Lord Jesus.


    Good morning, my dear friends. How are you?

    Friends, before we go about doing our tasks for today. First, let us kneel down in prayer. Prayer helps, my brothers and sisters.

    Let us devote some quiet time for prayer. 🙏

    Taimtim tayong manalangin, aking mga kapatid.


    Matapos manalangin, tayo mag-umpisa sa ating task, at gawain.

    We have this task from folks at Kode Kloud. With their Kode Kloud engineer hands-on learning program.

    If you also want to sign-up for it. You can, also. My friend, it is free of charge. Every body can sign up for it too.

    Point your web browser to this address: https://engineer.kodekloud.com

    Sign-up with your valid and working email address. And you should be good to go.

    If I remember it correctly, you don’t need a credit card for you to learn off their hands-on program.

    However…

    For their learning lectures inside the academy. You’ll need to pay a subscription cost, correlating with the kind of plan you’ll choose from their selection. Alright, folks?

    Okay, let’s get started for today’s task.

    We have MariaDB. Or… for lack of it, according to our task, it is down and unavailable for one of our applications. Without it, our app will not work at all.

    So, we need to bring it back up again, and online.

    Yes, sounds like a plan.

    Here’s the details.

    There is a critical issue going on with the Nautilus application in Stratos DC. The production support team identified that the application is unable to connect to the database. After digging into the issue, the team found that mariadb service is down on the database server.

    Look into the issue and fix the same.

    Oh, one more thing, in case you’re wondering about it. Nautilus is a web application from a fictitious tech start-up or company that Kode Kloud has set-up for us to train from, as “on the job” trainees with their Kode Kloud engineer program.

    And, 100 Days of DevOps, what we’re trying to do, or to become a part of presently, is part of that learning program. It’s good that they made it free and available to all folk.

    God bless them.


    First off, my friends I’m writing this weblog of learnings (and mistakes) so that I could find and hopefully land a job.

    For our task at hand, we need reference into the infrastructure of our Kode Kloud engineer ecosystem.

    This means, we need to know what server machines are available to us. And if possible, how to access what we need to help do our task.

    We’re looking for the server where the MariaDB (Maria Database) is installed, configured, and where it’s suppose to run to serve our web application (called “Nautilus”).

    Here is the infrastructure details, according to Kode Kloud’s website.

    Okay.

    Friends. According to this, the database server is at the hostname called “stdb01”.

    It could be the Linux instance that hosts our Maria DB service. We’ll need to check it out, my friends.

    We need to log into our database server.

    ssh peter@stdb01

    We enter the database server password. That you can find from the infrastructure table above.

    Okay. We’re able to log in to our database server. That’s good.

    Alright.

    Wait. Hang on, my friends. I’ll grab my mug of coffee, and take a sip of coffee – for some coffee goodness. ☕

    I hope you’re also able to have some coffee from where you are, my brothers and sisters.

    Folks, I need the caffeine in the morning.

    Thanks for being around with me.

    We input this Linux command, to check if MariaDB is on our database server.

    sudo systemctl status mariadb

    According to the print out, the software MariaDB is installed inside our database server.

    However, it is currently stopped and disabled.

    mariaDB disabled presently

    When we attempt to start mariaDB. We can’t.

    sudo systemctl start mariadb
    Sorry, can't start maria DB

    We’ll need to find out what’s going on, my friends.

    And work with what looks like a dependency. To fulfill it, so that we can hopefully get mariaDB started as a service.

    Folks, a dependency is something we call a software, or a service that we need to be installed, or running first – before we can add or install an additional software, or service. It needs to come first, in a way of saying.

    Like you need to have some coffee beans first, before you can brew coffee.

    Hmm…

    My brothers and sisters, it seems I made a mistake here.

    Hang on, let’s trace our steps. And try to learn from our mistakes. We pick up the lessons, okay my friends?

    From our database server. We can enable mariaDB, with a system utility called “systemctl”.

    sudo systemctl enable mariadb

    However, we can’t start mariaDB for an unknown reason.

    sudo systemctl start mariadb

    We’ll need to dig deeper, my brothers and sisters.

    This Linux command above, if it works, should resolve our database server.

    Error streams points to some clues that helps us in our troubleshooting

    This error stream or error message points us where we need to look. For our troubleshooting.

    We need to look at the “systemctl status” and “journalctl”.

    These are services that manage and look after Linux processes. Processes is another name we call software that runs to provide a service to an instance, or computer for this matter.

    Let me look into this one for a while, my friends. And I’ll get back to you if I find anything worth the while to share. Sorry.


    Friends, I found this link from the trace of the error logs.

    https://mariadb.com/kb/en/library/systemd

    It might be helpful. For it looks like the web documentation of mariaDB.

    Let’s take a look.


    Here’s what we know so far.

    • We’re able to login to our database server (yay!! :D)
    • We have mariaDB installed (also, yay!! XD)
    • However, we can’t start mariaDB, but we can enable it (hmmmmm…. 🤔🤔🤔🤔🤔)

    Nothing yet.

    I’m at my wits end! 😆

    But we must keep trying.

    We’ll learn something new this way. Okay, friends?


    So my brothers and sisters, we’ve found the config file for mariaDB.

    Thanks to their documentation online. Kudos to their folks.

    However, for some another unknown reason, we can’t modify or even create a config file that Linux can read and implement.

    Sorry, I’ll have to keep working on it.

    We’re almost out of time. We have a time-limit for our task.

    I’ll re-do the task later on, my friends.

    Our task is not yet a failure. I believe it is a failure if we full give up.

    My friends, for now let us re-group and re-convene later on, to tackle this task of troubleshooting (or fixing a broken, or faulty component from mariaDB implementation).

    Again, thanks for being around with me.

    God bless us, one and all. 🙌


    Okay, folks.

    Sorry.

    I just had breakfast. And now having a bowl of cookies and some coffee.

    Me trying to read mariaDB’s web documentation.


    To find something helpful.

    While also, trying to ask for some help online. Asking around, I found one that has the same lab exercise.

    I’ll implement later what I learn off of these, okay folks?

    Peace be with you all.


    Okay, folks.

    I’m done with eating some cookies off of a bowl. And my coffee’s gone now too.

    Don’t worry my friends, I’m also now trying to watch my caffeine intake along with sugar intake too.

    We’re getting old.

    Alright…

    According to someone from Burma. As the person whose tutorials I found online is speaking in Burmese. Thanks to him for that.

    In order to get our mariaDB started. We need to do two things first. And that’s to:

    • Check if “/var/lib/mysql” exists, if it exists it needs to be empty.
      • I didn’t know this before, sorry folks, I’m not an expert either with databases.
    sudo rm -frdv /var/lib/mysql

    If the folder, or directory isn’t empty. Force Linux to remove all pre-existing files and folders inside the directory.

    Otherwise, starting mariaDB will fail again.

    sudo mkdir /var/lib/mysql

    Then, re-create a fresh folder/directory without any content inside. With the “mkdir” Linux command.

    • Then you need to change owners with a Linux command. “chown” to enable mariaDB service to access and utilize the directory at /var/lib/mysql
      • This is my personal understanding of what I found.
    sudo chown -R mysql:mysql /var/lib/mysql

    Folks, you can find the same tutorial (note that the language is in Burmese). Here: https://youtu.be/K1XCIpp6Ts4


    Credits to brother developer from Burma, for the YouTube tutorial.

    Don’t forget to start the mariaDB service.

    sudo systemctl start mariadb

    Check the service status to verify if mariaDB has properly started.

    sudo systemctl status mariadb

    Thanks, and I think that’s it for now, my brothers and sisters.

    God bless!

    ‘Til next time.

    Kapayapaan nawa’y suma-inyo at suma-ating lahat, mga kapanalig at mga kaibigan.

  • Day 08 of 100 Days of DevOps – with Kode Kloud education – Ansible Install for our server configurations (and some furry friends, at home)

    Day 08 of 100 Days of DevOps – with Kode Kloud education – Ansible Install for our server configurations (and some furry friends, at home)

    Hi’ya! Hi folks.

    How are you doing today?

    Magandang umaga! Kamusta po kayo ngayon, mga kapatid?

    Folks, I hope you’re doing well at this time, regardless where you’re at.

    Good morning!

    My friends, for today we have a task from folks at Kode Kloud. Here it is:

    During the weekly meeting, the Nautilus DevOps team discussed about the automation and configuration management solutions that they want to implement. While considering several options, the team has decided to go with Ansible for now due to its simple setup and minimal pre-requisites. The team wanted to start testing using Ansible, so they have decided to use jump host as an Ansible controller to test different kind of tasks on rest of the servers.

    Install ansible version 4.9.0 on Jump host using pip3 only. Make sure Ansible binary is available globally on this system, i.e all users on this system are able to run Ansible commands.

    We’re told to install a piece of software called “Ansible”.

    Folks, Ansible is a very good helper when it comes to managing and putting up Linux server(s) configurations. It is a tool for automating the various processes necessary for configuring machine instances, or servers.

    It runs on Python programming language, hence, we install it via pip3, a Python software package manager.

    And we’re asked to install Ansible on our jump host.

    For reference, here is our infrastructure manifest from Kode Kloud engineer program.

    Okay.

    My friends, let’s begin.

    First off, we invoke “cat” a Linux command that prints and lets us read various text content on the terminal. Once more, it is short for “concatenate”.

    And it just helps to think about our lovable house pets, cats at home, when we try to remember about this Linux utility program.

    For me, it helps. To think about literal cats. Or other animals, when remembering some Linux commands for example. Yes, folks? 😀

    Since one of our cats here is presently pregnant (for a second time this year, wow!) with kittens.

    Me thinks I’ll name one of the kittens from the litter, “Meow-zilla!” 😀 Haha! Or, “Miaw-miaw”.

    What do you think, folks? 🙂

    Also, one of our well-loved kittens at home, named “Bruce”, has been missing for several days now. 🙁

    There’s no one left anymore from the first batch of kittens that our cat has reared this year.

    Anyway, let’s go back to our task, folks.

    Right… we need to install Ansible into our jump host machine. And we’re told to do this via “pip3” (pronounced: “pip three”).

    To determine what Linux distribution we have in the machine we have before us. We enter this Linux command.

    cat /etc/os-release

    Usually, this command will print out the OS (operating system) details for you.

    However, in the event that it doesn’t. I dunno. Please look up another way online. Give it a try. If you have trouble, feel free to reach out and let me know. From my side, I’m willing to work on it with you folks.

    There’s other ways to know a distribution’s OS details other than this.

    It will still likely involve the Linux command, “cat”. 😅

    Sorry, this is what I know. And, I learned it from one of Kode Kloud’s learning lectures.

    Enter this Linux command from the terminal. So that we can determine if “pip3” is installed on our machine.

    pip3

    Since it prints out what we can do with the program. And not an error. Then, this means that the package manager is installed and running on our system.

    Now, my friends, we install Ansible with this Linux command.

    sudo pip3 install ansible==4.9.0

    Note, that we have specified a software version (in this case, 4.9.0). If you leave the version blank, it should install the current or latest version available.

    After you enter the server password, it should install this software for you.

    Then, you’ll need to do the following:

    ansible --version

    Folks, we invoke Ansible and ask its version on our system. This is one way to understand if we have the right piece of software properly installed on our server.

    And, that’s it my friends.

    For our purposes, our task for today is now done.

    Good job! Excellent.

    See you folks tomorrow! Thanks, and may God bless you all.


    Peace, my friends!

    Make coffee, not war! Alright, folks?

    Good stuff.

  • Day 07 of 100 Days of DevOps – with Kode Kloud – Linux SSH connectivity and asymmetric keys

    Day 07 of 100 Days of DevOps – with Kode Kloud – Linux SSH connectivity and asymmetric keys

    Peace be with you, my friends.

    How are you folks doing?

    In the holy Name of Christ our Lord Jesus, peace be with you.

    Good morning!

    Greetings from a small space, off the east-side of the pearl of the orient, the good islands of the Philippines.

    Alright, today our task from Kode Kloud engineer learning program is this one.

    The system admins team of xFusionCorp Industries has set up some scripts on jump host that run on regular intervals and perform operations on all app servers in Stratos Datacenter. To make these scripts work properly we need to make sure the thor user on jump host has password-less SSH access to all app servers through their respective sudo users (i.e tony for app server 1). Based on the requirements, perform the following:

    Set up a password-less authentication from user thor on jump host to all app servers through their respective sudo users.

    Task for 7th Day of 100 Days of DevOps – about SSH connections

    Folks, we’ve been given a task to set-up a password-less connectivity (in terms of authentication and receiving authorization to do tasks) via SSH connection from our jumphost, to our application servers.

    This means, we need to generate cryptographic keys (or also known as SSH keys) from our jumphost (origin, with user “thor”) to our application servers’ sudo users. Namely, these are the following.

    • stapp01 (with user, “tony”)
    • stapp02 (with user, “steve”)
    • stapp03 (with user, “banner”)

    Here’s the infrastructure schematics for our learning program at Kode Kloud engineer.

    Once we have generated our keys with this command.

    ssh-keygen

    We securely copy our public key to each application server.

    With these Linux commands. One for each server.

    ssh-copy-id tony@stapp01
    ssh-copy-id steve@stapp02
    ssh-copy-id banner@stapp03

    And to verify that we have password-less access from our “thor” user on our “jumphost”.

    We need to SSH from “thor@jumphost” into each of the application servers. Without having or needing to input their passwords anymore.

    ssh tony@stapp01

    Like this one, and so on for the other two (2) application servers. Namely, “steve@stapp02” and “banner@stapp03”.

    Once we’re able to log-in and connect via SSH without the server’s password.

    If you need to check the servers’ passwords and other details. Refer to the infrastructure schematics above.

    Our task is done for today.

    Alright!

    Okay, it’s story time. Let’s talk more about this thing called SSH and keys.

    SSH stands for “secure shell”.

    It is technology that allows someone outside of a network of servers. To securely connect to a server at that network.

    Folks, I believe everyone of us do this. Often, without our knowledge.

    When you generate keys for SSH. You generate what’s called an “cryptographically asymmetric keys”.

    Meaning, a software program creates two keys, or a key pair.

    One is called a public key.

    The next one, the private key.

    And both are necessary, and play an important role to security.

    I’m no longer going to delve into details about these. However, it is good to note that if the other key encrypts information or data. Only the other key can decrypt, or unlock it properly.

    If you want to learn more about asymmetric keys.

    I believe this YouTube explainer video will be helpful.

    https://youtu.be/_zyKvPvh808?si=wCOxWF2EGYBnMV7b

    Asymmetric key pairs are very important to modern computing security. At keeping your online accounts, and whatnot secure. It is also at work with the website pages we visit. Like this page.

    SSL or the connection that makes webpages communicate with other webpages securely online runs on a combination of symmetric and asymmetric key encryptions.

    For example, through a secure internet connection called SSL. You can securely browse the web. It helps keep what you enter in form fields, like your name, email address, and postal address safe. And it prevents other unauthorized persons from reading or snooping on your website activities.

    My friends, SSL is very good. It helps keep us all safe online. From cyber-criminals, from unethical hackers, and from scammers.

    However, it is not fullproof. I believe nothing is. However still, having SSL or encryption enabled in your web browser session is best practice for anybody.

    Your browser should warn you. If for example, you’re visiting a website that doesn’t have SSL. It could be potentially dangerous for you, or anybody, without encryption or security of SSL. Especially if you’re buying things online from a website or an online shop that doesn’t have it enabled correctly.

    I don’t consider myself an absolute expert in the field of cryptography or security. However, it is part of my job to know a little. So that working together, we can keep other people we serve safer online. Through our products and services we make available to you.

    Anyway, enough about this for now, my friends.

    What happens in our task. When we generate a key pair from our jumphost (under a user called “thor”).

    One public key.

    And second, a private key.

    Then, we securely copy our public key to all the other application servers.

    Doing this, allows us to securely login or SSH from thor@jumphost into the application servers we’ve copied our public key to. Like app server: “banner@stapp03”.

    Remember, that thor@jumphost still retains a private key.

    Once we attempt to SSH or log-in to an app server with our public key. The app server checks for the private key.

    If it sees the right private key. It lets the SSH connection establish.

    This way, we don’t need to write and input a password every time.


    That’s it for now, my friends.

    And, may the good Lord of heaven and earth be with you all, my dear brothers and sisters in Christ.

    May God bless us.

    Kapayapaan nawa’y suma-inyo at suma-ating lahat.

    Salamat po.

  • Day 06 (continuation, this time, with the needed laboratory exercise) of 100 Days of DevOps – with Kode Kloud – Create Cron Jobs

    Day 06 (continuation, this time, with the needed laboratory exercise) of 100 Days of DevOps – with Kode Kloud – Create Cron Jobs

    Hi’ya folks! How are you guys doing today?

    Recently, have you been working on something that excites you?

    Will you tell me about it, friends?

    Anyway, here we are with our 7th Day of 100 Days of DevOps (learning and doing what we can to practice it).

    And with this, good Kode Kloud people has given us a task to do the following:

    The Nautilus system admins team has prepared scripts to automate several day-to-day tasks. They want them to be deployed on all app servers in Stratos DC on a set schedule. Before that they need to test similar functionality with a sample cron job. Therefore, perform the steps below:

    a. Install cronie package on all Nautilus app servers and start crond service.

    b. Add a cron */5 * * * * echo hello > /tmp/cron_text for root user.

    Okay!

    Now, we have our task.

    Let’s do what we can, alright?

    Friends, we’ll need to do it from a Linux instance (I believe, a CentOS one, now I could be wrong here).

    First, for good measure we’ll need to understand what Linux instance we have before us. Sometimes, different distributions have varying nuances.

    With this Linux command, we can ask the system to display or print OS details.

    cat /etc/os-release

    According to this, we’re on a CentOS 9 instance. Okay, good.

    Next, our task tells us to install a utility software called “cronie” unto all our application servers.

    Namely, servers with hostnames:

    • stapp01 (with user, tony)
    • stapp02 (with user, steve)
    • stapp03 (with user, banner).

    Here’s our Kode Kloud Engineer infrastructure details – for added information about the server machines we need to work on. For our task at hand.

    We’ll need these set of Linux commands for CentOS. To install “cronie” and start the daemon service for it to run cron jobs.

    sudo dnf install cronie -y

    This tells Linux to install cronie through a specific CentOS package manager called dnf.

    sudo systemctl start crond

    And this command, invokes a system processes manager called systemctl to start our cron jobs process. A cron daemon service called crond.

    sudo systemctl enable crond

    This tells Linux to set crond as one of the processes that will self-initialize when you restart your Linux instance. Meaning, it will run during start up after a restart.

    sudo systemctl status crond

    Finally, this invokes the system manager to tell us the present status of the cron job service called crond.

    After every 5 minutes, the cron job will write a line of text “hello” on to a text file at the /tmp/ directory or folder. It will create a file, if it doesn’t exist yet.

    And after checking it. We have this.

    We have the text line displaying “hello”.

    And folks, you can read a text file’s content in Linux with the “cat” command. It means, concatenate, but for me, it helps to remember this Linux command with linking it with our lovable and very cute house cats. 😀 Meow-za! ^_^ Haha!

    Alright, folks!

    Now, we have to create our cron job.

    We can do that with the following Linux commands.

    sudo crontab -u root -e

    This lets us create cron job instructions and a schedule for that task. With the current user we’re logged on as (in this case, root).

    */5 * * * * echo hello > /tmp/cron_text

    We need to enter this specific line inside the crontab text or configuration file.

    If it opened with a text editor called “vi” or “vim”. You’ll need to press the key “i” first before you can start typing some text.

    Then, when you’re done. Save your changes and exit the text editor program with pressing “esc” then “wq”.

    Doing this, will save (or write) your changes to memory and then the program will quit.

    Finally, after 5 minutes has passed. You can check if the cron job has done its job. With a “hello” text getting written. And file called “cron_text” being created at the folder or directory at /tmp/.

    cat /tmp/cron_text

    This Linux command will allow you to check your file and its text inside.

    Remember to wait for at least 5 mins after you’ve created and saved a cron job schedule.

    That’s it for now – good job!

    Well done!

  • Day 06 of 100 Days of DevOps – No laboratory for today – For me, it’s time for lectures & book study

    Folks, how are you guys doing today?

    From my side over here, I greet you a good morning! In Filipino, we say to you friends, Magandang umaga po!

    How are you? Kamusta ka?

    Friends, for today I’m taking a break from some hands-on laboratory exercises. While it is good to keep going. I also need to have an understanding, a grasp, around concepts that give us a picture of why we do things as we do. With all the various software and tools we need to work with.

    Not saying hands-on practice isn’t important, sorry, far from it.

    From what I have learnt over the passage of time. A good mix of hands-on work (or practice) is necessary. With ample time devoted to absorb, learn, and grasp some of the wisdom of others much more experienced than ourselves – through things such as good books, online podcasts, and their lectures too.

    Alright?

    We give our thanks. Salamat.

    Okay, that’s it for now, my dear friends.

    Thank you, and may God bless us all.

  • Day 05 of 100 Days of DevOps: SE Linux (Security Enhanced Linux) Install & Config – DevOps with Kode Kloud education

    Day 05 of 100 Days of DevOps: SE Linux (Security Enhanced Linux) Install & Config – DevOps with Kode Kloud education

    Good morning, folks!

    How are you guys doing over where you’re at?

    Greetings from a small space.

    Friends, today for our 5th Day of 100 Days of DevOps with Kode Kloud Engineer (if you want to check it out, or sign-up to learn with me, you can, for free, it’s at this link: https://engineer.kodekloud.com).

    We’re given a task from the folks at Kode Kloud.

    To install a security-focused set of tools for Linux.

    It’s for making our Linux instances a little more safer for downstream activities geared for other people we serve, through our collective work.

    Called, “SE Linux”.

    Now, okay, let’s have a go at it. Shall we?

    First off, we bring up Kode Kloud Engineer’s infrastructure. You can view it here (https://kodekloudhub.github.io/kodekloud-engineer/docs/projects/nautilus#infrastructure-details)

    Then, we carefully read the briefing and instructions from Kode Kloud.

    Our task is to…

    Following a security audit, the xFusionCorp Industries security team has opted to enhance application and server security with SELinux. To initiate testing, the following requirements have been established for App server 1 in the Stratos Datacenter:

    1. Install the required SELinux packages.
    2. Permanently disable SELinux for the time being; it will be re-enabled after necessary configuration changes.
    3. No need to reboot the server, as a scheduled maintenance reboot is already planned for tonight.
    4. Disregard the current status of SELinux via the command line; the final status after the reboot should be disabled.

    Okay.


    We have our task.

    Task for Day 5 of 100 Days of Dev Ops. Install and configure SE Linux (Security Enhanced Linux)

    First off, we ssh into the needed application server. In this case, stapp01.

    ssh tony@stapp01

    Once more my friends, you can ssh through the application server’s IP address. If the hostname doesn’t map properly to it.

    ssh tony@172.16.238.10

    Then, enter the server application’s password for SSH.

    You can find it listed on the table from Kode Kloud Engineer’s infrastructure schematics above.

    sudo su -

    You might also want to elevate privileges to becoming a root user, temporarly.

    Not doing this, might prevent you from doing this task properly. Or, you’ll see errors.

    Folks, the root password is the same as your initial password for SSH for tony@stapp01.

    sudo yum update -y

    Initiate to update the yum package manager.

    sudo yum install selinux-policy selinux-policy-targeted -y

    This begins to install SE Linux along with other necessary dependencies.

    sudo vi /etc/selinux/config
    Configuring to disable SE Linux

    Remember that we need to change the value from the SE Linux config file saying “SELINUX=enforcing”.

    To “SELINUX=disabled”.

    Without doing this, we will not be able to go forward with the task checker.

    While running “vi”, press “i” to start making changes to the text file. With vi, pressing the key “i” invokes the program to insert mode. This allows you to tangibly make changes.

    To save and exit your changes from the “vi” text editor. You need to press “esc” and then type “wq!”.

    What does this do?

    • When you press “esc” while editing a text file from vi.
      • It will allow you to enter commands. Like to exit without saving. Or to save any changes made first, then exit the text file.
      • In this case, we want to save the changes, and then, exit the file.
        • So, what we can do is press “esc” first. Then enter the keys “wq!”
          • “w” means to write changes to storage.
          • “q” means to quit the vi text editor program after making the save.
          • and finally, “!” means to force doing the preceding actions. Which, is to save first and then exit the application.
    Verify the SE Linux is set to disabled

    Optionally, you can invoke the “grep” command to look for the words “disabled” from the saved config file for SE Linux.

    This will help you ascertain if the file had been tangibly changed. And that the changes were saved prior to exiting the vi text editor application.

    Alternatively, you can also invoke this command to determine what is the status of SE Linux from your instance (in this case, we’re running on a CentOS 9 instance).

    sudo sestatus
    Day 5 of 100 Days of DevOps - task checker from Kode Kloud Engineer

    If your “sudo sestatus” returns a value of “disabled”.

    You’re good to go.

    Click the “check your work” button. To invoke Kode Kloud’s task correctness checker tool.

    If you’ve done the task correctly, it should let you pass. Otherwise, it will show task failure. And then, you can choose to re-do this task.

    Alright.

    That’s it for now, my friends.

    God bless you! And, thanks.